← All guides
Easy dinners
A No-Cook Meal Plan: Simple Meals You Can Assemble
Plan meals without a stove or oven, build a practical grocery list, and keep no-cook, microwave-only and ready-to-eat choices separate.
9 min read · Grocerplan editorial team
Updated November 3, 2026
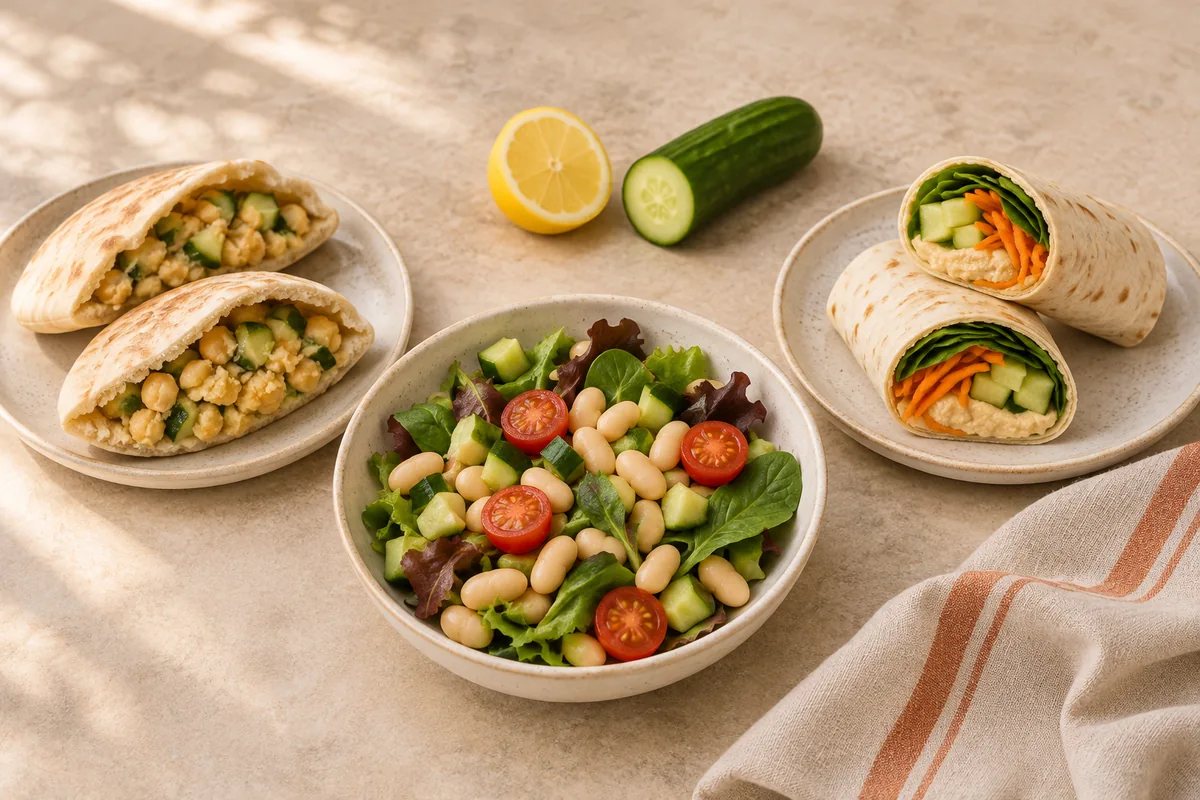
AI-generated illustration of the no-cook meal ideas; quantities are illustrative.
A no-cook meal plan starts with ingredients that are ready to eat, then combines them into meals. It should not hide a step that asks you to boil pasta, cook rice or roast chicken first. The recipes below use canned beans, ready-to-eat bread or wraps, vegetables and clearly labeled cooked proteins. You still need basic preparation and safe storage, but you do not need a stove or oven.
Start with three no-cook meals
Try Chickpea Crunch Pitas, White Bean Cucumber Salad and Hummus Crunch Wraps. Each recipe starts at two servings. All three use cucumber; the pitas and bean salad also share lemon and olive oil. The starter keeps these three choices together, and you can remove a meal, choose an alternative or adjust the servings before saving.
Choose these no-cook meals, then create a free account to save one grocery list. Your selected meals and servings stay with you through signup; saving happens only when you choose it. Review quantities and anything you already have before shopping. There is no price or nutrition estimate for this menu.
Decide what “no cooking” means for your week
Assembly-only means opening, draining, chopping and combining. Microwave-only allows heating in a microwave, following package directions. Ready-to-eat can mean a complete prepared meal with almost no work. These are useful but different choices. Tell your planner which appliances you have, whether you can refrigerate food and how much preparation you want to do.
Before choosing, make a short equipment check: a fridge or reliable cold storage, a can opener if needed, a knife and board, and containers for anything you open. A meal described as quick may still require heat, while a cold dish may rely on rice or chicken cooked earlier. Read the preparation steps as well as the title.
A useful request is: “Plan dinners I can assemble without heat. I have a fridge, a knife and a can opener, but no blender. Repeating a meal is fine.” If you can use a microwave, say so separately and follow the product's heating directions. “No cooking” should describe the work you can actually do.
Choose meals that share ingredients
Look for a small set of overlapping groceries before choosing a different recipe for every day. Cucumber can go into a wrap, a bean salad and lettuce cups. Canned white beans can become a salad or a caprese-style plate. Buying familiar ingredients that you will use again can be easier than finding a long list of specialty products.
The recipe servings below are a starting point, not a prescribed diet or calorie target. Adjust the amounts for the people eating and any side dishes. For a medical diet, use the instructions you have been given. These recipes do not provide a personalized nutrition plan.
You can also use the ingredient-reuse guide to work through shared groceries and packages. Reusing cucumber in several meals is useful only when you want those meals and can store the cucumber appropriately.
Meals to assemble
Use the ingredient names as a shopping checklist and check the actual product labels. “Fully cooked” and “ready to eat cold” matter for the chicken option. Raw chicken, raw fish, uncooked dried beans and products that require heating are not substitutions for these recipes. Choose canned corn rather than assuming frozen corn can be eaten without cooking.
Chickpea Crunch Pitas
Serves 2. Estimated active preparation: 12 minutes.
•
15 ounce canned chickpeas
•
2 each pita bread
•
1 each cucumber
•
1 each lemon
•
1 tablespoon olive oil
1.
Drain and rinse the canned chickpeas. Dice the cucumber.
2.
Mash half the chickpeas with the olive oil and juice from half the lemon. Stir in the remaining chickpeas and cucumber.
3.
Divide between the pitas and serve without heating. Refrigerate ingredients that require chilling until assembly.
White Bean Cucumber Salad
Serves 2. Estimated active preparation: 10 minutes.
•
15 ounce canned white beans
•
1 each cucumber
•
1 cup cherry tomatoes
•
3 cup prewashed salad greens
•
1 each lemon
•
1 tablespoon olive oil
1.
Drain and rinse the canned beans. Dice the cucumber and halve the tomatoes.
2.
Toss the beans and vegetables with the olive oil and lemon juice to taste.
3.
Divide over the prewashed greens and serve. Keep chilled until ready to eat.
Hummus Crunch Wraps
Serves 2. Estimated active preparation: 10 minutes.
•
2 each ready-to-eat flour tortillas
•
0.75 cup hummus
•
1 cup prewashed shredded carrots
•
1 each cucumber
•
1 cup prewashed baby spinach
1.
Use tortillas labeled ready to eat without heating. Cut the cucumber into thin sticks.
2.
Spread hummus over the tortillas and add carrots, cucumber and spinach.
3.
Roll tightly and cut in half. Serve immediately or keep refrigerated; no heating is needed.
Black Bean Corn Bowls
Serves 2. Estimated active preparation: 10 minutes.
•
15 ounce canned black beans
•
8 ounce canned sweet corn
•
1 each avocado
•
0.5 cup ready-to-eat salsa
•
3 cup prewashed shredded romaine
•
1 each lime
1.
Drain and rinse the canned beans. Drain the canned corn; use canned ready-to-eat corn, not frozen corn that requires cooking.
2.
Divide romaine, beans and corn between two bowls. Dice the avocado and add it.
3.
Spoon salsa over the bowls and squeeze lime juice to taste. Serve cold and refrigerate perishable ingredients until assembly.
Caprese White Bean Plates
Serves 2. Estimated active preparation: 10 minutes.
•
15 ounce canned white beans
•
4 ounce pasteurized fresh mozzarella
•
1 cup cherry tomatoes
•
0.25 cup fresh basil
•
1 tablespoon olive oil
•
1 tablespoon balsamic vinegar
1.
Drain and rinse the canned beans. Halve the tomatoes and cut the pasteurized mozzarella into bite-size pieces.
2.
Divide beans, tomatoes and mozzarella between plates. Tear basil over the top.
3.
Drizzle with olive oil and balsamic vinegar. Serve cold; keep the cheese refrigerated until assembly.
Tuna White Bean Lettuce Cups
Serves 2. Estimated active preparation: 10 minutes.
•
5 ounce canned light tuna
•
15 ounce canned white beans
•
6 each prewashed romaine leaves
•
1 each lemon
•
1 tablespoon olive oil
•
1 each cucumber
1.
Drain the canned tuna and drain and rinse the canned beans. Dice the cucumber.
2.
Mix tuna, beans and cucumber with olive oil and lemon juice to taste.
3.
Spoon into the romaine leaves. Serve immediately or refrigerate; the tuna must be canned and ready to eat, not raw fish.
Ready-Cooked Chicken Salad Wraps
Serves 2. Estimated active preparation: 10 minutes.
•
8 ounce fully cooked ready-to-eat chicken breast strips
•
2 each ready-to-eat flour tortillas
•
2 cup prewashed shredded romaine
•
1 each cucumber
•
0.25 cup plain Greek yogurt
•
1 each lemon
1.
Check that the chicken and tortillas are labeled fully cooked and ready to eat cold. Do not use raw chicken or products whose package requires cooking or reheating.
2.
Dice the cucumber. Mix yogurt with lemon juice to taste, then fold in the ready-to-eat chicken and cucumber.
3.
Divide romaine and chicken salad between tortillas and roll. Keep chicken and yogurt refrigerated until assembly and follow the package storage instructions.
Turn your choices into a grocery list
Start by choosing the meals you actually want, then write down the quantities for your household. Combine repeated ingredients and check what is already in your pantry. Keep a distinction between a recipe amount and a package: a recipe may use part of a container, while the retailer sells the whole container. Compare package sizes before checkout so you neither run short nor accidentally buy several large packs.
Use the no-cook starter to keep your selection together and save its ingredients as one grocery list. If you already have a different list, you can add missing ingredients there instead. Review quantities before using Shop on Instacart. On Instacart, select the store, check the matched products, make substitutions if needed and complete checkout yourself. Store availability, package sizes and prices can change. A saved list or an opened shopping link is not a confirmed purchase.
For the nights when you do want to cook, the quick recipe collection provides a separate starting point. Those recipes may require heat; they are not the no-cook menu above. Keeping those two kinds of meals clearly labeled makes a mixed week easier to manage.
Plan around your fridge, not just your calendar
A long planning horizon does not mean buying all the fresh food at once. Keep shelf-stable items unopened until needed, and buy chilled ingredients in a cadence that fits their labels and the storage you have. Use the ready-to-eat products promptly and follow the manufacturer's instructions after opening. Keep raw foods separate from foods you will eat without further cooking.
Keep the refrigerator at or below 40°F and follow the storage instructions on opened products. If you are taking a meal away from home, arrange reliable cold storage; “no-cook” does not mean shelf-stable. Do not assume a chilled meal can stay in a bag until lunch without a way to keep it cold.
For allergies, review each product label and replacement. A recipe name or dietary tag cannot guarantee suitability. People at greater risk of foodborne illness may need additional ready-to-eat food precautions; the FDA guidance below explains those differences.
Make the next week easier
After you have tried the meals, keep the combinations you enjoyed and remove ingredients you did not use. Note which product choices and package sizes worked. Reusing a familiar list is useful, but always check the contents again before shopping. No-cook planning works best when it reduces the work you actually find difficult, rather than adding a new set of rules to follow.
Sources
•
The meal instructions and quantities above are Grocerplan editorial assembly recipes. Preparation times are estimates, not measured guarantees; no nutrition or store-price claims are made.
•
FDA: Play It Safe with Ready-to-Eat Foods, reviewed November 3, 2026, for storage, separation and package-handling guidance.
•
FDA: Are You Storing Food Safely?, reviewed November 3, 2026, for refrigeration and perishable-food handling.
Keep these no-cook meals through signup
Choose a starter menu, adjust meals and servings, then create a free account to save your selection as one grocery list. Review it before shopping on Instacart or at any store.
Choose no-cook meals →
Or create a free account